In the following the constituents of a calibration certificate for non-automatic weighing instruments are explained.
Depending on the type of the scales the content may vary.
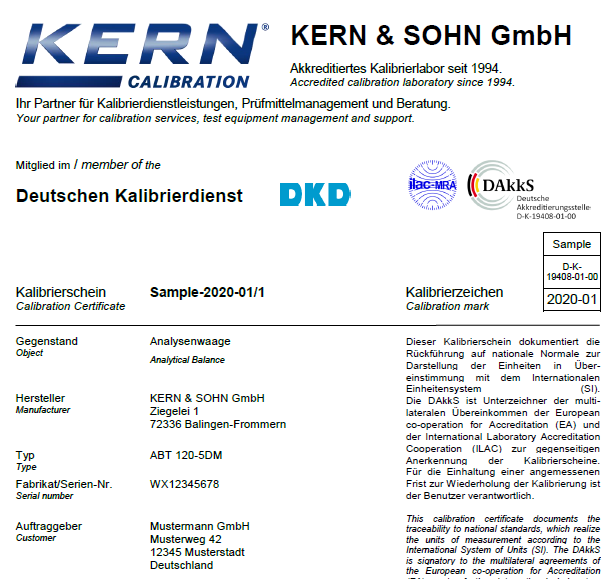
1. "Official" document
The KERN calibration laboratory (D-K-19408-01-00) is accredited by the Deutsche Akkreditierungsstelle GmbH (DAkkS). The calibration certificate with accreditation symbol is recognised internationally and is available in several languages.
2. Item to be calibrated
The calibration item as well as the type or model with serial number is documented. This means that there is no confusion and guarantees the assignment of the calibration certificate to a specific balance.
3. Traceability
The reference standards of the accredited laboratory are monitored in strictly defined cycles and periodically brought into line with national and thereby international standards. This is carefully documented and given on the calibration certificate. In this way the basic fundamental traceability to the national standard is ensured.
4. Contracting authority
On the very first page of the calibration certificate you will clearly see the applicant or operator of the calibrated checking equipment.
5. Stamp and signature
According to DIN EN ISO 17025, only the designation of the person responsible for the release of the report is required. Due to the value, we additionally print the laboratory stamp as well as the name and signature of the laboratory management and the person responsible for the release of the report.

6. Metrological part
As well as other tests, three metrological tests are carried out during accredited calibration. These include repeatability, errors of indication and off-centre loading. This fully characterises the balance.
In standard the measuring points are distributed according to EURAMET cg-18. However, further measurement points are also possible in repeatability measurement and in display deviations.
Kindly let us know your desired additional measuring points in your order and we will be glad to consider those. You can find the price for the additional measuring points here.
If several calibrations ("as found" / "as left") have been performed on the balance due to an adjustment or repair, the calibration certificate will contain a separate section for each of these states with the corresponding measured values and results.
Please note that this is only performed on demand. Regularly you will receive the calibration certificate with the values "as left".
If you also require the values before any adjustment or repair please let us know in your order.
Since this is an optional service it will be charged additionally.
An explanation of the calibration "as found/as received" and "as left/as returned" can be found here.
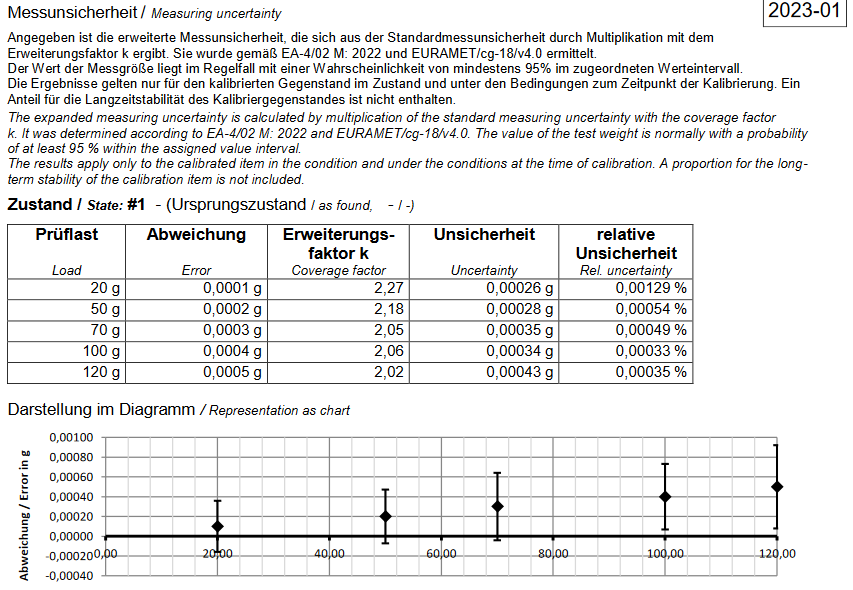
7. Measurement uncertainty of a balance
This is determined individually for each balance according to a precisely given test method and is documented in the calibration certificate. It depends on various factors, both internal and external to the balance.
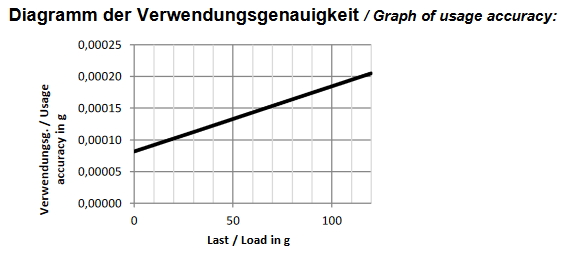
8. Usage accuracy
Usage accuracy gives the uncertainty when the operator uses the measuring equipment on site. This value, which is established by a mathematical equation, is affected by changes in temperature, type of use an other factors.
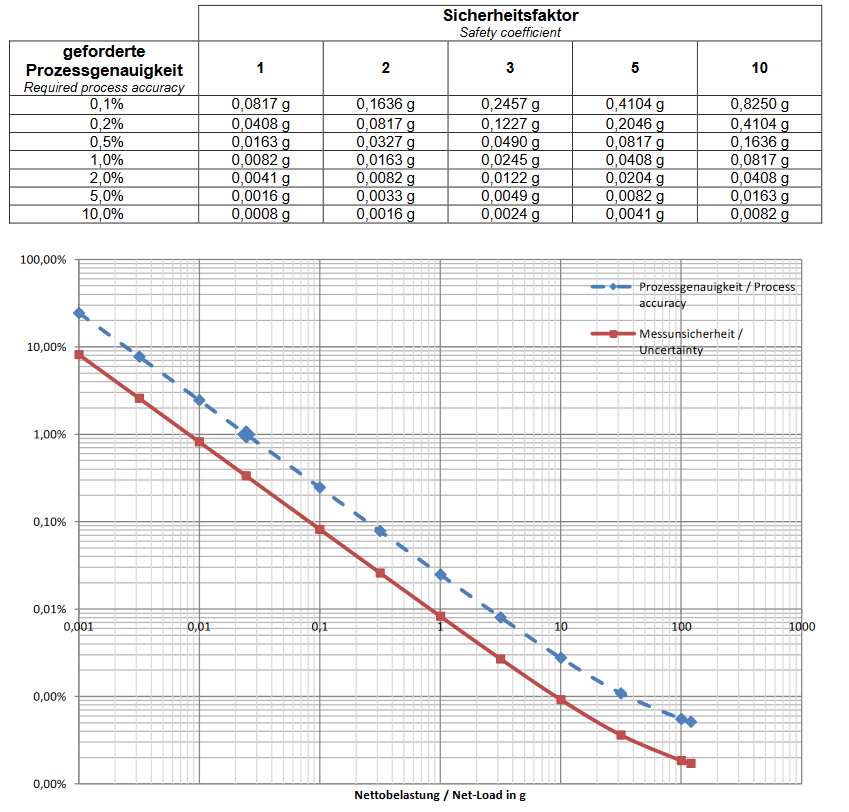
9. Minimum weight of sample (additional achievement)
The smaller the sample weight, the larger the relative measuring uncertainty. For those responsible for weighing processes, it is important to determine the deviations which occur when establishing values of the smallest loads. Determining the minimum sample weight declares in this way, clearly the various requirements on the weighing accuracy in relation to the sample weight.
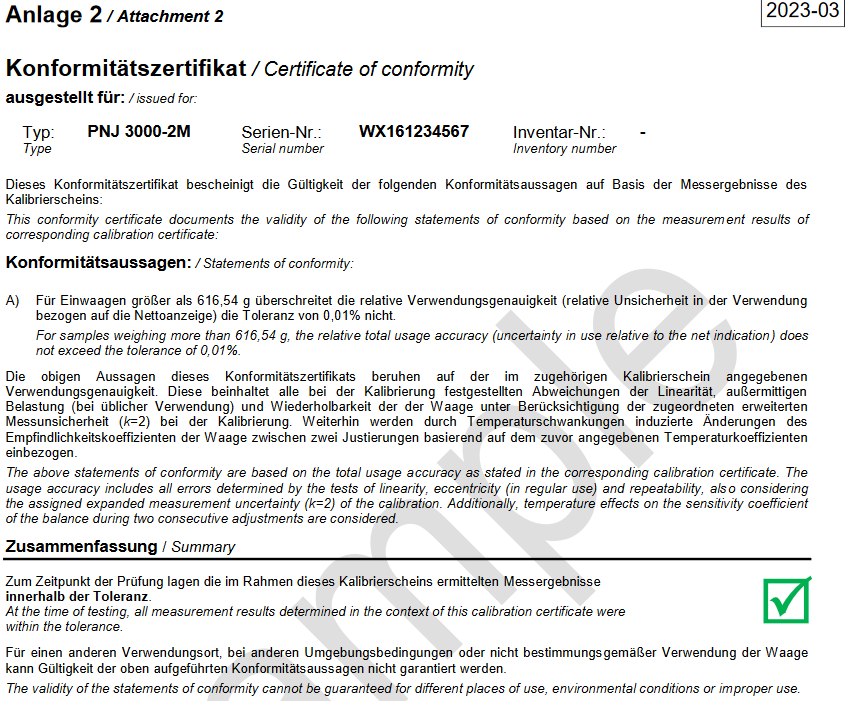
10. Certificate of conformity (additional achievement)
In combination with a calibration certificate with accreditation symbol the certificate of conformity serves as a documented confirmation that the balance fulfills the requirements defined by you. There are different tolerance specifications that can be chosen:
- Uncertainty and / or calibration results relative
- Uncertainty and / or calibration results absolut
- Measured values as specification of manufacturer (KERN balances or other manufacturers)
- Measured values as specification of customer
A certificate of conformity can be issued independent of manufacturer for new calibrated balances as well as for a recalibration of balances.
You will find more information about the certificates of conformity here.


