News about the KERN calibration laboratory
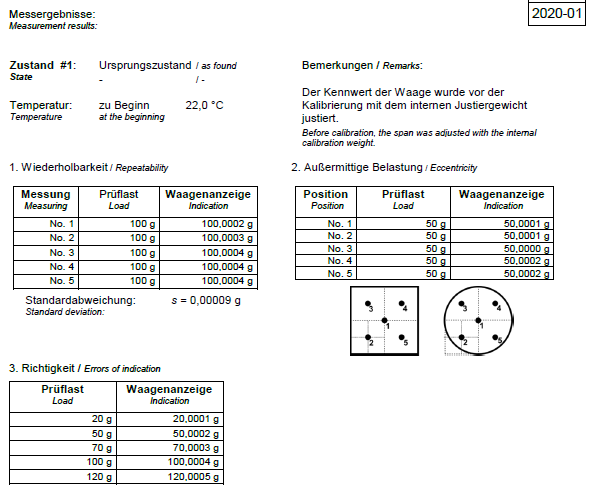
For the DAkkS calibration of balances the standard procedures of EURAMET cg-18 are used. This particularly defines, which measuring points have to be considered for a certain and traceable calibration.
For sure we already extended the measuring points of the repeatability and accuracy measurement on customers requirements in the past additionally to the distributed standard measuring points for the calibration of balances.
Now we added this additional service to our range. For the accuracy measurement it is possible to expand to as much measuring points as you require. For the repeatability measurement we can offer max. 10 measuring points in total.
Here you can find the prices for the calibration of balances as well as the prices for the new additional measuring points:
|
Weighing range |
Initial calibration | Price € excl. of VAT ex works |
Recalibration | Price € excl. of VAT ex works |
|---|---|---|---|---|
| Analytical balances | ||||
| Max ≤ 5 kg | 963-101 | 210,- | 963-101R | 215,- |
| Max > 5 kg | 963-102 | 260,- | 963-102R | 275,- |
| High resolution precision scales (>500.000d) | ||||
| Max ≤ 5 kg | 963-103 | 178,- | 963-103R | 183,- |
| Max > 5 kg - 50 kg | 963-104 | 205,- | 963-104R | 210,- |
| Max > 50 kg - 350 kg | 963-105 | 225,- | 963-105R | 235,- |
| Precision scales / industrial scales | ||||
| Max ≤ 5 kg | 963-127 | 108,- | 963-127R | 111,- |
| Max > 5 kg – 50 kg | 963-128 | 130,- | 963-128R | 133,- |
| Max > 50 kg – 350 kg | 963-129 | 161,- | 963-129R | 165,- |
| Max > 350 kg – 1500 kg | 963-130 | 225,- | 963-130R | 235,- |
| Max > 1500 kg – 2900 kg | 963-131 | 305,- | 963-131R | 310,- |
| Max > 2900 kg – 6000 kg | 963-132 | 610,- | 963-132R | 620,- |
| Max > 6000 kg – 12000 kg | 963-133 | 680,- | 963-133R | 700,- |
| Hanging scales / crane scales *1 | ||||
| Max ≤ 5 kg | 963-127H | 108,- | 963-127HR | 111,- |
| Max > 5 kg – 50 kg | 963-128H | 130,- | 963-128HR | 133,- |
| Max > 50 kg – 350 kg | 963-129H | 152,- | 963-129HR | 156,- |
| Max > 350 kg – 1500 kg | 963-130H | 270,- | 963-130HR | 285,- |
| Max > 1500 kg – 2900 kg | 963-131H | 415,- | 963-131HR | 420,- |
| Max > 2900 kg – 6000 kg | 963-132H | 680,- | 963-132HR | 700,- |
| Max > 6000 kg – 12000 kg (auf Anfrage) | 963-133H | 960,- | 963-133HR | 990,- |
| Preparation for calibration (Cleaning, function test) |
969-003R | 27,- |
| Additional services: | Art.no. |
Price € |
| Minimum sample weight | 969-103 | 10,- |
| Express service with delivery time 48 hours | 962-116 | 55,-/scale |
| Additional measuring points/ accuracy test |
963-140 | 5.50/measuring point |
| Additional measuring points/ Repeatability measurement (Standard: 5 measuring points) |
963-140 | 5.50/up to 10 measuring points |
| Express shipping (in Germany only): Express surcharge for guaranteed delivery on the next working day (if ready for despatch by 12 h) |
40,-/package | |
| Certificates of conformity*2: | ||
| Measured values as specification of manufacturer (KERN balances) | 969-517 | 23,- |
| Measured values as specification of manufacturer (other manufacturers) | 969-515 | on request |
| Measured values as specification of customer | 969-516 | on request |
| Uncertainty in use as supplement to the calibration certificate with accreditation symbol (relative) | 969-511 | on request |
| Uncertainty in use as supplement to the calibration certificate with accreditation symbol (absolute) | 969-512 | on request |
| Calibration results as supplement to the calibration certificate with accreditation symbol (relative) | 969-513 | on request |
| Calibration results as supplement to the calibration certificate with accreditation symbol (absolute) | 969-514 | on request |
*1 For the recalibration of crane scales the filled and signed safety certificate is needed.
*2 For further information about our certificates of conformity click here.
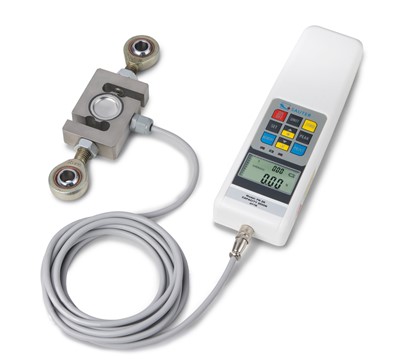
The DAkkS accreditation of the KERN calibration laboratory in the range of force was expanded recently!
By installing new and fully automatic force calibration machines of highest accuracy we were able to increase the accredited measuring range for force gauges at 2N up to 5kN in push and pull force.
So from now on it is also possible for us to DAkkS calibrate your force gauges in this range!
The calibration will be performed according DAkkS-DKD-R 3-3 for the following range:
| Measurement/ calibration object |
Measuring range/ |
Best measurement |
Force Calibration Machine (FCM) |
|---|---|---|---|
| Force Gauge: Pull | 50 N to 500 N | 5,0·10-4 | 500N-K-BNME |
| Force Gauge: Push and pull | 2 N to < 4 N | 1,0·10-3 | 200N-K-BNME |
| Force Gauge: Push and pull | 4 N to 200 N | 5,0·10-4 | 200N-K-BNME |
| Force Gauge: Push and pull | 50 N to 5 kN | 5,0·10-4 | 5kN-K-BNME |
You can also find the details on our annex of the accreditation certificate.
You are welcome to send your force gauges directly to our calibration laboratory. Your advantages at one sight:
Of course a works calibration of your foce gauge is especially for other measuring ranges still possible.
At the following you will find the explanation of the components of an calibration certificate for force gauges.
Depending on the force gauge and calibration bearing the content may diversify.
You can also download the Sample calibration certificate with accreditation symbol force measuring device DKD-R 3-3 (German/English).
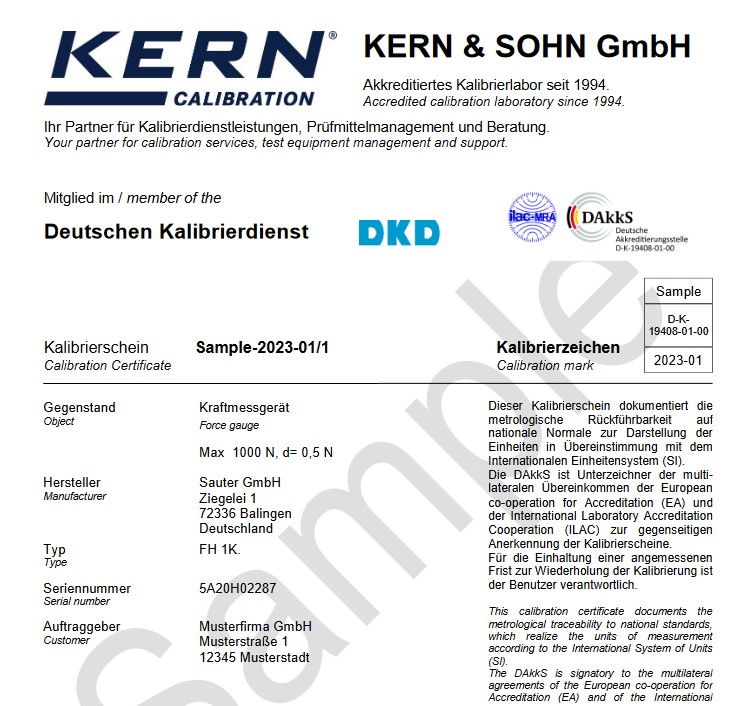
The KERN calibration laboratory (D-K-19408-01-00) is accredited by Deutsche Akkreditierungsstelle GmbH (DAkkS). The calibration certificate with accreditation symbol is recognised internationally and is available in several languages.
The calibration item as well as the type or model with serial number is documented. This means that there is no confusion and guarantees the assignment of the calibration certificate to a specific balance.
The reference standards of the accredited laboratory are monitored in strictly defined cycles and periodically brought into line with national and thereby international standards. This is carefully documented and given on the calibration certificate. In this way the basic fundamental traceability to the national standard is ensured.
On the very first page of the calibration certificate you will clearly see the applicant or operator of the calibrated checking equipment.
According to DIN EN ISO 17025, only the designation of the person responsible for the release of the report is required. Due to the value, we additionally print the laboratory stamp as well as the name and signature of the laboratory management and the person responsible for the release of the report.
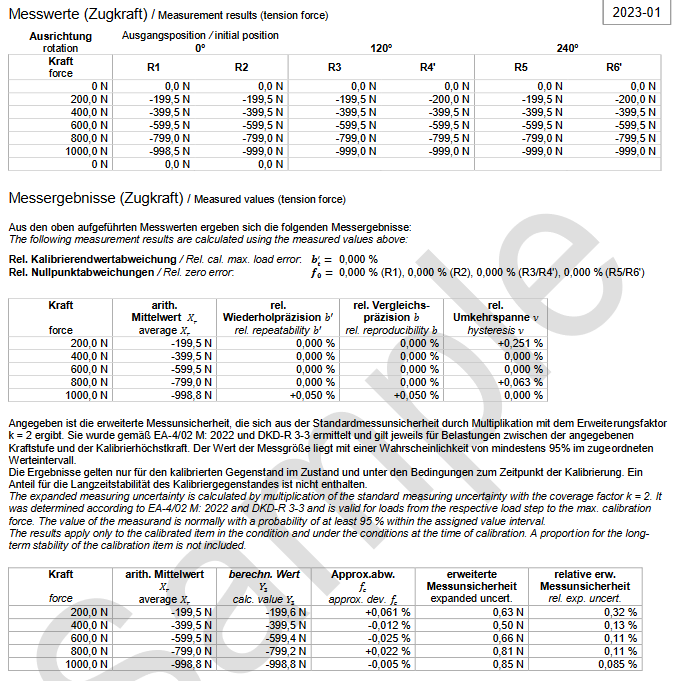
In this part of the certificate for every direction of force the "rough" measurands of the calibration will be documented for traceability. Depending on precognition of the measuring device, e.g. its type and of course the customer's desires, different calibration processes according to DKD-R 3-3 can be applied. The calibration processes vary in amount and sort of the processed test series (especially in mounting position and rising resp. descending load) and allow to adept the complexity to the customers requirements of accuracy.
Using the example calibration process A is shown. First the force gauge will be loaded three times with preload at calibration maximum load. Then 6 test series within 3 different mounting positions will be assimilated:
Because of the loading done twice with as identical as possible conditions the repeatability can be determined.
The rotation - and for this reason necessary anewed mounting into the loading mechanism - allows conclusion to model and device significiant incertitude at the initiation of calibration force of the device and whose sensibility on it (reproducibility)
The influence of hysteresis of the measuring system on the shown measurand appears by decreasing load at test series R4' and R6'. The mechanical load (distortion, warping) as well as the creep by e.g. thermal effects result that the measurand differes at unloading and loading despite identical calibration force (hysteresis error).
Especially the return to zero therefore is a dimension for the creep of the measuring device while loading.
Out of the "rough" measurands the relative technical measurement parameters of the calibrated force gauge can be calculated. At the following the imprinted values within this section of the calibration certificate will be stated, the calculation itself is specified exactly at the calibration norm DKD-R 3-3.
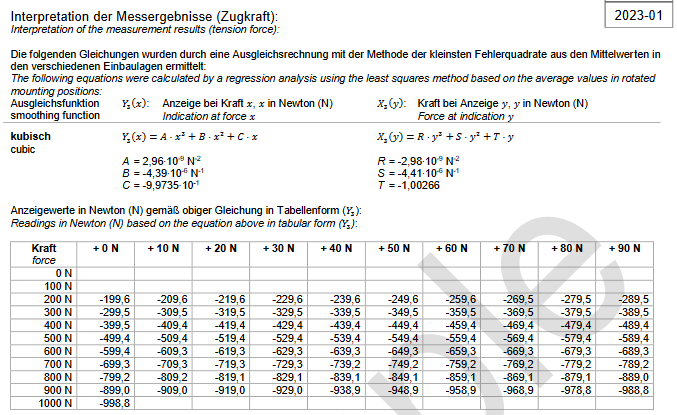
The measurement and measuring results mentioned on the preceded page document the indication error of the measuring device at the respectively applied calibration force. There is made no statement for the whole measuring range.
An adjustment theory about the medium display values in the post-assembly positions allow to estimate the indication error of the device over the whole measuring range at optional load. The result of this adjustment theory (with a polynomial of third class under application of the "least squares" method) can be found on page 4 of the calibration certificate.
Below you can find the prices for a DAkkS calibration of force gauges which are pretty economy regarding the competetive comparison. You can also find the price list here.
Accredited calibration, tension
| KERN | Measurand | Measuring range |
Price € |
|---|---|---|---|
| 963-161* 963-161R* |
force: with interface recalibration |
≤500 N | 195,- |
| 963-161O 963-161OR |
force: without interface recalibration |
≤500 N | 360,- |
| 963-162* 963-162R* |
force: with interface recalibration |
>500 N - 2 kN | 235,- |
| 963-162O 963-162OR |
force: without interface recalibration |
>500 N - 2 kN | 360,- |
| 963-163* 963-163R* |
force: with interface recalibration |
>2 kN - 5 kN | 330,- |
| 963-163O 963-163OR |
force: without interface recalibration |
>2 kN - 5 kN | 440,- |
| 969-003R | Preparation for calibration (cleaning, function test) |
27,- |
Accredited calibration, compression
| KERN | Measurand | Measuring range |
price € |
|---|---|---|---|
| 963-261* 963-261R* |
force: with interface recalibration |
≤500 N | 195,- |
| 963-261O 963-261OR |
force: without interface recalibration |
≤500 N | 360,- |
| 963-262* 963-262R* |
force: with interface recalibration |
>500 N - 2 kN | 235,- |
| 963-262O 963-262OR |
force: without interface recalibration |
>500 N - 2 kN | 360,- |
| 963-263* 963-263R* |
force: with interface recalibration |
>2 kN - 5 kN | 330,- |
| 963-263O 963-263OR |
force: without interface recalibration |
>2 kN - 5 kN | 440,- |
| 969-003R | Preparation for calibration (cleaning, function test) |
27,- |
Accredited calibration, tension and compression
| KERN | Measurand | Measuring range |
price € |
|---|---|---|---|
| 963-361* 963-361R* |
force: with interface recalibration |
≤500 N | 355,- |
| 963-361O 963-361OR |
force: without interface recalibration |
≤500 N | 490,- |
| 963-362* 963-362R* |
force: with interface recalibration |
>500 N - 2 kN | 440,- |
| 963-362O 963-362OR |
force: without interface recalibration |
>500 N - 2 kN | 490,- |
| 963-363* 963-363R* |
force: with interface recalibration |
>2 kN - 5 kN | 580,- |
| 963-363O 963-363OR |
force: without interface recalibration |
>2 kN - 5 kN | 580,- |
| 969-003R | Preparation for calibration (cleaning, function tes) |
27,- |
*valid only for Sauter devices, for other manufacturers the price for calibration without interface will be charged.
We are looking forward to calibrate your force gauges in the future in a fast and cost-efficient way!

Now it is possible to check your order status directly online.
For this you only need the number of the order confirmation as well as your customer number, which you can also find on the order confirmation.
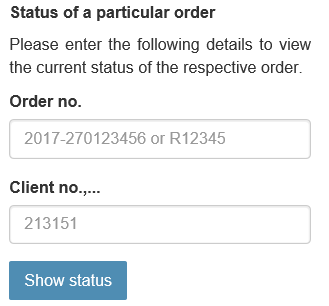
As soon as you entered this data your latest order status will be shown.
You can also download documents corresponding to the order like delivery note, invoice and as well the calibration certificates of your equipment.
It is also possible to track your delivery with one click if the order was already sent.

From now on you will find a new feature on kern-lab.com: our online Price quote generator.
No matter if for your weights, balances of other measuring devices - our price quote generator will offer you the appropriate price for any calibration within the range of our accreditition.
A possible option is also the works calibration as well as the reverification of balances and weights.
The creation of your offer ist quite simple: Choose your equipment that has to be recalibrated, enter your contact details and you will get your offer - suitable, transparent and without any delay.
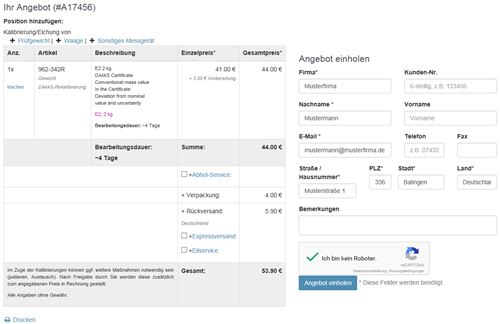
You do not have the possibikity to send your equipment and desire the organization by us? No problem, this is also a chooseable option.
If you have any further questions please feel free to contact our Team.